Demo
Background
In this tutorial, I’m going to show you how I made a touch joystick in the Godot Engine.
If you’ve never heard of Godot, it is a 2D and 3D gaming engine that can export to virtually any platform. It’s designed to be easy for beginners and hobbyists, but also powerful enough for experienced developers. Get more information on Godot here.
If this engine sounds interesting to you, I suggest you follow the step-by-step guide on their website through the “Your first game” tutorial.
This series of tutorials is basically just a glimpse into my journey of making a puzzle game I’ve thought about for a number of years and I’ll be providing little gems as I come across them.
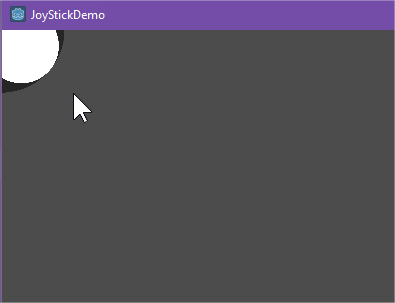
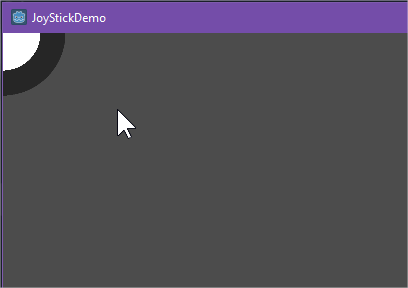
First off, if you’re unfamiliar with what I mean by a Touch Joystick, it’s a virtual joystick that appears on touchscreens that users can manipulate as though it was a physical one. Here are some images that might give you an idea.
Here’s a video demo of my finished touch joystick:
Prerequisites
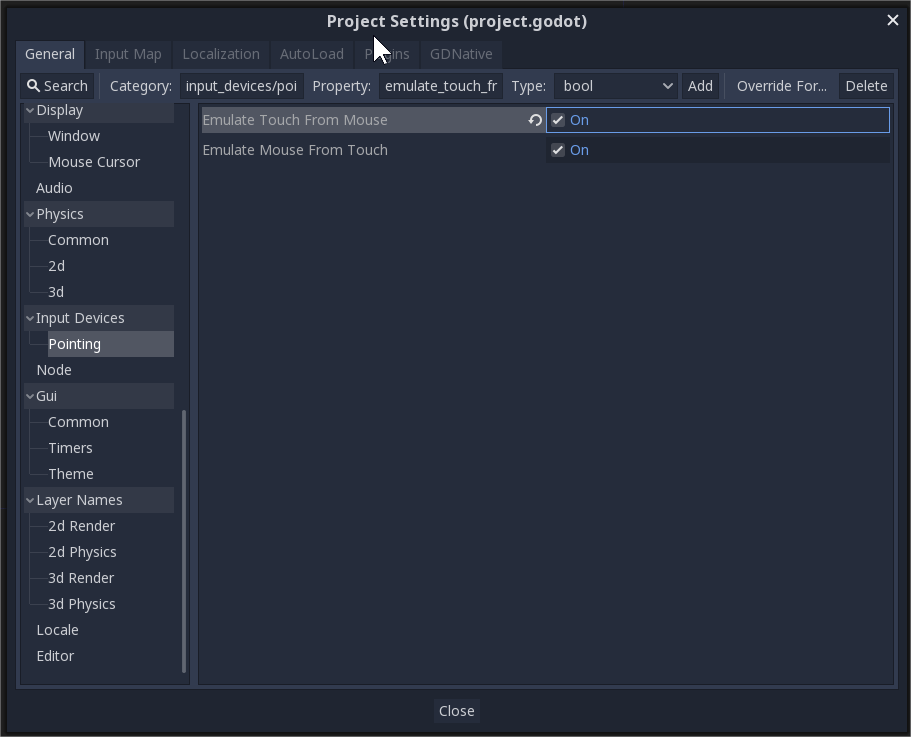
First off, remember to turn on the setting for emulating touch from mouse input. The Godot editor doesn’t seem to allow touch input when debugging within it.
Implementation
The first thing we’re going to do is create two circles. Here, I’m using two Sprite nodes, JoyStick, and JoyBase. The JoyStick is going to be smaller than the JoyBase. Make sure not to change their positions, they should both be centered around (0,0).

Next, we need a script for the JoyStick that listens for touch input and adjusts the position of the Joystick accordingly.
I’m adding the script to the JoyStick sprite node because if I attach the script to the parent node, the entire scene will change position rather than just the joystick itself (unless I decide to always access the child’s positioning, which feels like a hassel).
Here’s what I’m starting with:
func _input(event):
	if event is InputEventScreenDrag:
		position.x = position.x + event.relative.x
		position.y = position.y + event.relative.y
This allows us to drag the center circle anywhere around the screen.

But we don’t want the joystick to be able to leave the base, so we’re going to clamp it’s position (except we won’t use clamp):
func _input(event):
	if event is InputEventScreenDrag:
		position.x = position.x + event.relative.x
		position.y = position.y + event.relative.y
		if position.length() > maxLength:
			var angle = position.angle()
			position.x = cos(angle) * maxLength
			position.y = sin(angle) * maxLength
This way, the inner circle will never be allowed to leave the outer circle. We can’t use clamp because that only works for rectangular clamping, so instead, we’re having to figure out the angle of the drag vector and setting the length to be the maximum radius.
In order to obtain the maximum radius, you may need to do some fancy math to obtain (unless Godot decides to implement a global size property. (Otherwise, you can calculate the radii of the two circles manually and just hardcode maximum radius like I did initially)
extends Sprite

var radiusJoyStick
var radiusJoyBase
var maxLength
# Called when the node enters the scene tree for the first time.
func _ready():
	radiusJoyStick = global_scale.x * texture.get_size().x/2;
	radiusJoyBase = get_node("../JoyBase").global_scale.x * $"../JoyBase".texture.get_size().x/2
	maxLength = radiusJoyBase - radiusJoyStick
Anyway, now the JoyStick, can’t leave the base.
Next step in trying to get this scene to behave like a real-life joystick is to re-center the joystick when the user releases their finger. This is extremely easy.
func _input(event):
	if event is InputEventScreenDrag:
		position.x = position.x + event.relative.x
		position.y = position.y + event.relative.y
		if position.length() > maxRadius:
			var angle = position.angle()
			position.x = cos(angle) * maxRadius
			position.y = sin(angle) * maxRadius
	if event is InputEventScreenTouch and !event.pressed:
		position.x = 0
		position.y = 0
Now, the circle returns to (0,0) when the user lets go of it.
The last movement restriction we’re going to add is to make sure the joystick doesn’t move if the user did not start dragging with their finger in the joystick circle itself. That way, the joystick won’t move if the user is just dragging other elements around the screen.
Before I continue, I need to explain how the InputEventScreenDrag event works. It doesn’t produce a clean origin point and finishing point. Instead, as you’re dragging your finger across the screen, it produces a series of origin points and drag points calling the _input() function each time. With this in mind, if we’re going to restrict the joystick’s movement by where the initial start point of the dragging was, we need to use the InputEventScreenTouch event instead. So here, we are listening for when the screen is touched checking if that point is inside the joystick circle and then setting a flag based on that evaluation. We then update the drag event block to check that flag.
extends Sprite

var radiusJoyStick
var radiusJoyBase
var maxRadius
var touchInsideJoystick = false
# Called when the node enters the scene tree for the first time.
func _ready():
	radiusJoyStick = global_scale.x * texture.get_size().x/2;
	radiusJoyBase = get_node("../JoyBase").global_scale.x * $"../JoyBase".texture.get_size().x/2
	maxRadius = radiusJoyBase - radiusJoyStick

func _input(event):
	if event is InputEventScreenDrag:
		if touchInsideJoystick == true:
			position.x = position.x + event.relative.x
			position.y = position.y + event.relative.y
			if position.length() > maxRadius:
				var angle = position.angle()
				position.x = cos(angle) * maxRadius
				position.y = sin(angle) * maxRadius
	if event is InputEventScreenTouch:
		if !event.pressed:
			position.x = 0
			position.y = 0
		if event.pressed:
			touchInsideJoystick = (event.position - global_position).length() <= radiusJoyStick
Perfect. Now the control behaves just like a real joystick. We just need to emit a signal to allow other scenes to get it’s position.
extends Sprite

signal joystick_moved
signal joystick_released
var radiusJoyStick
var radiusJoyBase
var maxRadius
var touchInsideJoystick = false
# Called when the node enters the scene tree for the first time.
func _ready():
	radiusJoyStick = global_scale.x * texture.get_size().x/2;
	radiusJoyBase = get_node("../JoyBase").global_scale.x * $"../JoyBase".texture.get_size().x/2
	maxRadius = radiusJoyBase - radiusJoyStick

func _input(event):
	if event is InputEventScreenDrag:
		if touchInsideJoystick == true:
			position.x = position.x + event.relative.x
			position.y = position.y + event.relative.y
			if position.length() > maxRadius:
				var angle = position.angle()
				position.x = cos(angle) * maxRadius
				position.y = sin(angle) * maxRadius
			emit_signal("joystick_moved", position)
	if event is InputEventScreenTouch:
		if !event.pressed:
			position.x = 0
			position.y = 0
			emit_signal("joystick_released")
		if event.pressed:
			touchInsideJoystick = (event.position - global_position).length() <= radiusJoyStick
Testing
The beauty in keeping the Joystick at (0,0) is that the position vector can now be used to determine the direction and the speed. .angle() gets the direction of the vector from -PI/2 to PI/2, and the position with respect to the maxRadius can tell you how fast the character should be moving.
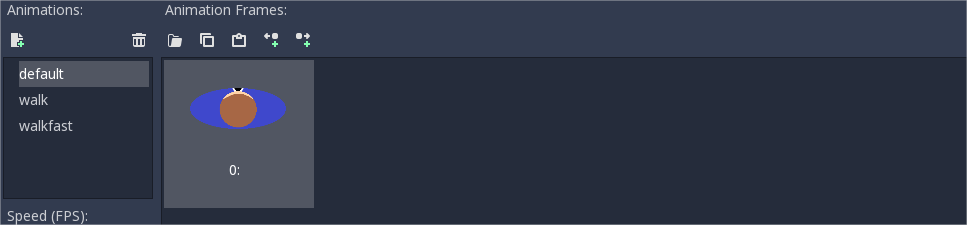
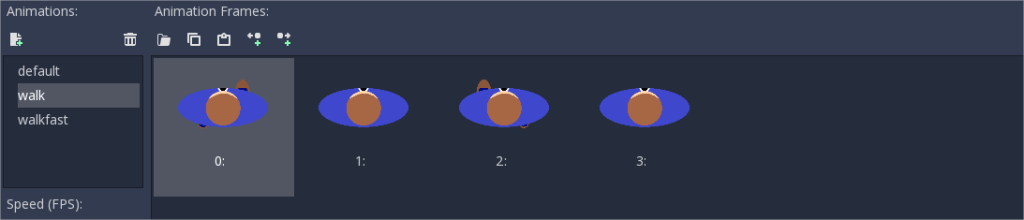
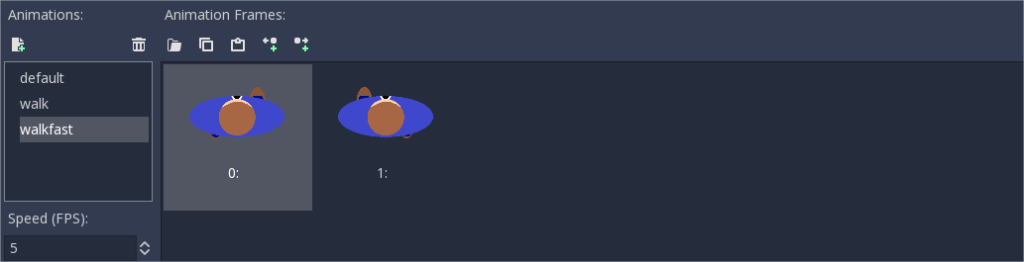
I won’t bog you down with too many details about the implementation of the Player scene because yours will likely be very different than mine, but I have a series of rudimentary sprites here:
I have some testing code for controlling the character with a keyboard that isn’t applicable for this demo (but let me know in the comments if you’d like a breakdown, you shouldn’t because it’s really simple).
extends Area2D

# Declare member variables here. Examples:
var speed = 10
var direction = PI / 2
var joystick_vector = Vector2()

# Called every frame. 'delta' is the elapsed time since the previous frame.
func _process(delta):
	var velocity = Vector2()
	# ARROW KEYS
	var any_key_pressed = false
	if Input.is_action_pressed("ui_left"):
		rotation -= PI/20
		any_key_pressed = true
	if Input.is_action_pressed("ui_right"):
		rotation += PI/20
		any_key_pressed = true
	if Input.is_action_pressed("ui_up"):
		direction = rotation - PI/2
		velocity = Vector2(speed, 0).rotated(direction)
		any_key_pressed = true
	if Input.is_action_pressed("ui_down"):
		pass
	if any_key_pressed == true:
		position += velocity.normalized()

	# JOYSTICK
	if joystick_vector.x == 0 and joystick_vector.y == 0:
		$AnimatedSprite.play("default")
	else:
		rotation = joystick_vector.angle() + PI/2
		if (joystick_vector.length() > 12.5):
			$AnimatedSprite.play("walkfast")
		else:
			$AnimatedSprite.play("walk")
		velocity = Vector2((joystick_vector.length()/25) * speed,0).rotated(joystick_vector.angle())
		position += velocity

	position.x = clamp(position.x, 0, get_viewport_rect().size.x)
	position.y = clamp(position.y, 0, get_viewport_rect().size.y)

func _on_joystick_moved(v):
	joystick_vector = v

func _on_joystick_released():
	joystick_vector = Vector2(0,0)
All that is really important here is two functions for listening to the signals and a Vector variable to store the vector sent by the signal.
As I said above, we use the length of the vector with respect to MaxRadius (which I’ve hardcoded in this instance, but shut up!) to determine the speed the character should be moving (with respect to its maximum speed). The .angle() property is used to determine where the character should face along with the direction of the moving vector.
Finally, we need a main scene where we add both the Player and the TouchJoystick.
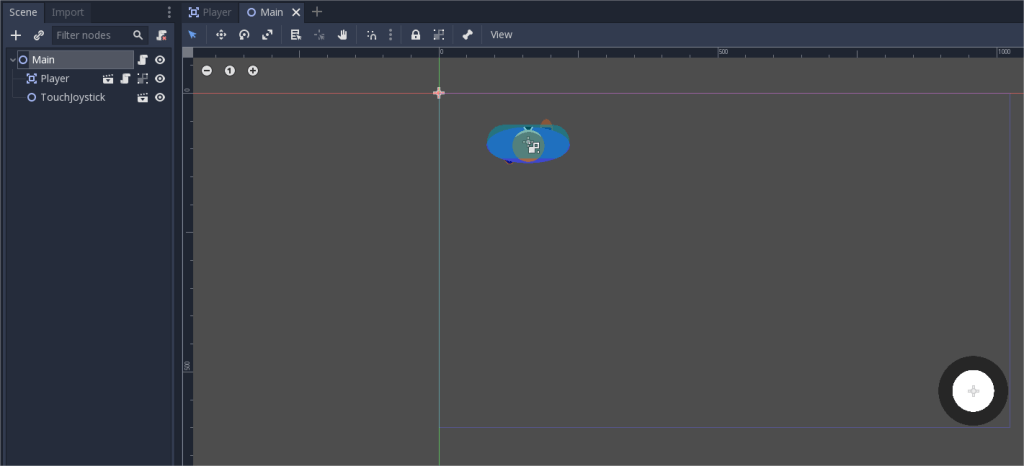
And then we just connect the signals:
extends Node2D

# Called when the node enters the scene tree for the first time.
func _ready():
	$TouchJoystick/JoyStick.connect("joystick_moved",$Player,"_on_joystick_moved")
	$TouchJoystick/JoyStick.connect("joystick_released",$Player,"_on_joystick_released")
