So there are no shortage of posts that say that if you use SVGs in your webpages, you can dynamically modify the images using vanilla Javascript, but there aren’t many sources that explain exactly how to do it. So for this post, I’m going to show you how I was able to change SVG fill colors using Javascript.
Step 1: Plop in your SVG file
As many sources will attest, you cannot use <img> tags to embed SVG files if you want to be able to edit them. Instead, I’m using an <object> tag, but some sources say that you can also use <iframe> tags but with performance hits, unreliability, etc.
<html>
  <head>
<style>
#svgObject {
  width: 25vw;
  height: 25vw;
}
</style>
  </head>
  <body>
    <object id="svgObject" type="image/svg+xml" data="public/assets/images/Risk_Crowding-filled.svg">
    </object>
  </body>
</html>
Step 2: Dissect the HTML in Dev Tools
Dissection
We’re going to play around with the console to see if we can change the color there first before proceeding further.
Under the Elements tab, fully expand the object.
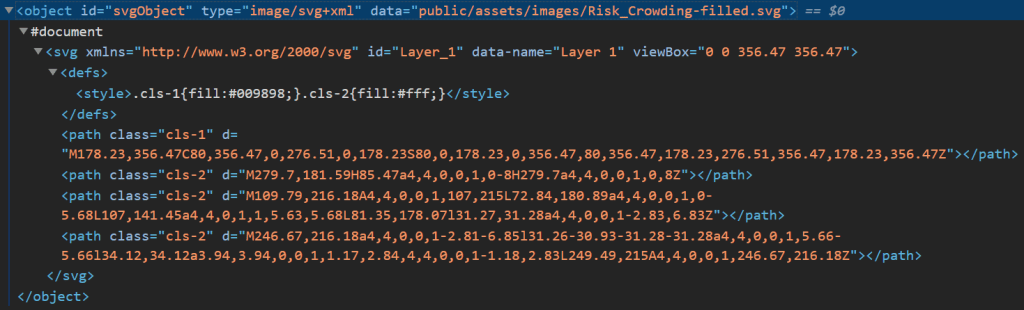
Notice that there is a #document node.
Because of this structure, you will not be able to access anything inside the document node using Javascript or Jquery as-is. This means that any calls to document.getElementsByTagName(“path”) will fail as well as calls to document.getElementsByClassName(“cls-1”) along with all the JQuery equivalents because those tags and classes are not in this document.. Instead, we need to get around this restriction by accessing contents of that embedded document.
Covert Operations
Type the following in the console:
document.getElementById("svgObject").contentWindowYou will see a Window object.
Next, type this in the console:
document.getElementById("svgObject").contentWindow.documentBAM!

Many modern web browsers (except Mozilla, I believe, as of the writing of this article) prevent accessing the contents of an embedded document or resource if the accessor has a different origin. This includes the hard disk accessing other locations of the hard disk.
Slipping past those motion sensing laser things
So how to we get past this major roadblock?
We need to put both our HTML and SVG file in a web server so that web browsers understand that they originate from the same location.
I’ll be using Node.js and Express.js to accomplish this.
So create the application with the standard commands in Git Bash:
npm init -y
npm install --save express
Excuse the extremely rudimentary standards-violating code here, since I’m trying to get us up and running ASAP.
In your server.js, serve the home page at the / route:
var express = require("express");

var app = express();

app.use(express.static('public'))

var PORT = 8080;

app.get("/",(req,res) => {
  res.sendFile(__dirname + "/index.html");
});

app.listen(PORT, function() {
  console.log("App listening on PORT " + PORT);
});
We’re using the express static middleware, so change the object tag to reference /assets instead of /public/assets:
Start your server:
npm startHead to http://localhost:8080 in your web browser.
Resuming the mission
Type the same javascript command in the console as above:
document.getElementById("svgObject").contentWindow.documentThis time, we get the #document without the cross-origin error.
Yay!
Now in my SVG file, there are path nodes with “cls-#” classes attached. Depending on your SVG file, you may need to use different selectors.
Type this in the console:
document.getElementById("svgObject").contentWindow.document.getElementsByClassName("cls-1")Now I see an HTMLCollection of a single path node returned:

Which means we can modify it.
document.getElementById("svgObject").contentWindow.document.getElementsByClassName("cls-1")[0].style.fill = "#000000";The SVG’s color has been changed.
Step 3: Coding Out the Color Change
Make the following changes to index.html:
<html>
  <head>
<style>
#svgObject {
  width: 25vw;
  height: 25vw;
}
</style>
  </head>
  <body>
    <object id="svgObject" type="image/svg+xml" data="assets/images/Risk_Crowding-filled.svg">
    </object>
    <label for="color1">Color 1: </label>
    <input type="color" id="color1">
    <label for="color2">Color 2: </label>
    <input type="color" id="color2">
  </body>
  <script type="text/javascript">
document.getElementById("color1").addEventListener("input",event => {
  const elements = Array.from(document.getElementById("svgObject").contentWindow.document.getElementsByClassName("cls-1"));
  const color = event.target.value;
  elements.forEach(element => {
    element.style.fill = color;
  });
});

document.getElementById("color2").addEventListener("input",event => {
  const elements = Array.from(document.getElementById("svgObject").contentWindow.document.getElementsByClassName("cls-2"));
  const color = event.target.value;
  elements.forEach(element => {
    element.style.fill = color;
  });
});
  </script>
</html>
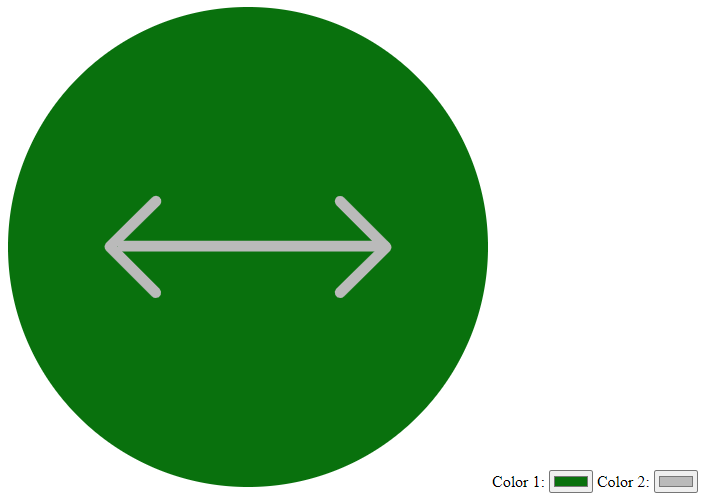
Now we have two color controls that can independently set the two colors of the SVG image:
Conclusion
You can follow this paradigm to edit other aspects of the SVG file, change paths, etc.
For my purpose, we just wanted the SVG colors to change to indicate the status of various components.
Have fun!
