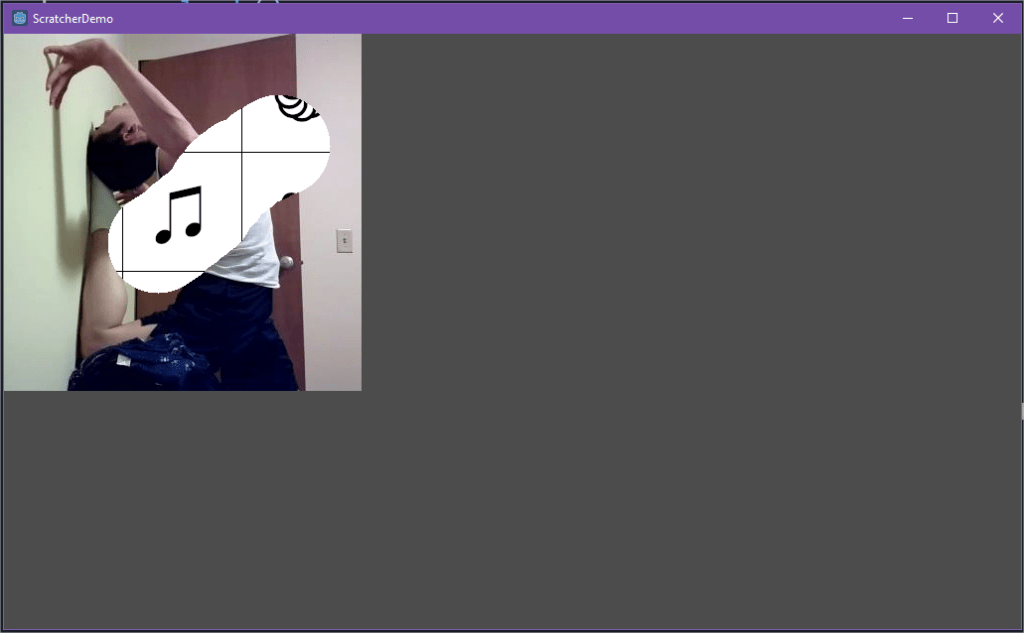
Demo
Background
This is a tutorial for creating a scratcher feature using the Godot feature. This tutorial will focus on the “drawing” aspect of a scratcher rather than the loading and reloading of images.
If you’ve never heard of Godot, it is a 2D and 3D gaming engine that can export to virtually any platform. It’s designed to be easy for beginners and hobbyists, but also powerful enough for experienced developers. Get more information on Godot here.
If this engine sounds interesting to you, I suggest you follow the step-by-step guide on their website through the “Your first game” tutorial.
This series of tutorials is basically just a glimpse into my journey of making a puzzle game I’ve thought about for a number of years and I’ll be providing little gems as I come across them.
Implementation
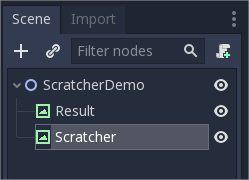
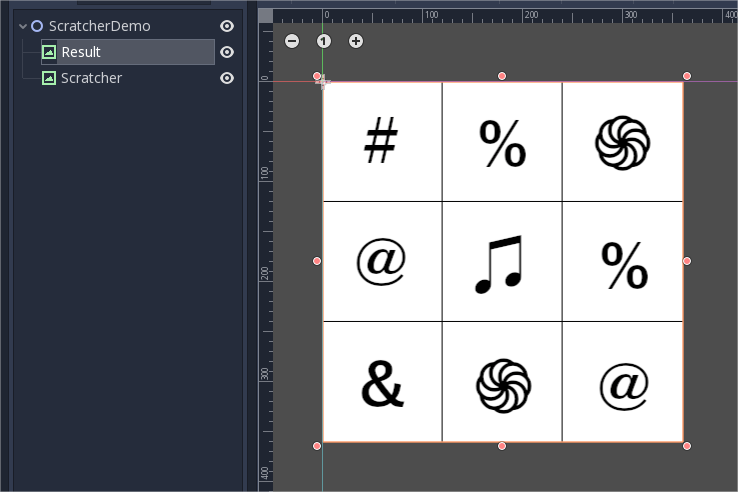
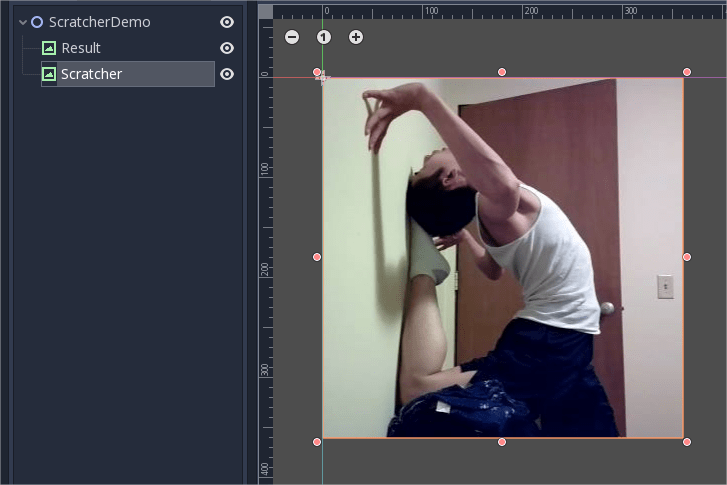
To my knowledge, there are only so many ways to display an image; and the only way to edit an image that is being displayed is using Image.set_pixel(). For this tutorial, I decided to use two TextureRect nodes. One for the image we’ll be scratching and the other to display the winning symbols.
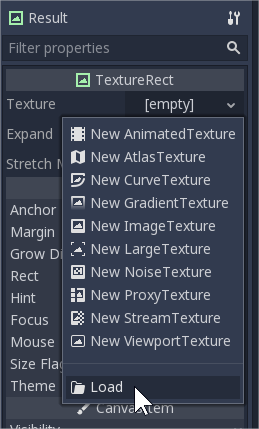
None of the other options for TextureRect will work for this purpose, so we’re just going to load images to the two Texture objects.
Let’s start by just listening for a normal touch event rather than a drag, we’ll erase a circle’s worth of pixels around the touch position.
Some quick notes about my starting variables, we need a reference to the imageTexture which will help us translate between the image and the texture, and a reference to image object to get able to get and set pixel values. The radius will be the radius of the circle we are erasing from the image, which I’ve hardcoded to 50 pixels. The color erase is what we’re setting each pixel within the circle to; the only important parameter here is the last one, setting the alpha bit to 0.
extends Node2D

var imageTexture : ImageTexture
var image : Image
var radius = 50.0
var erase = Color(0.0, 0.0, 0.0, 0.0)
Now we’re ready to erase a circle:
extends Node2D

var imageTexture : ImageTexture
var image : Image
var radius = 50.0
var erase = Color(0.0, 0.0, 0.0, 0.0)

func _ready():
	imageTexture = ImageTexture.new()

func _input(event):
	if event is InputEventScreenTouch and event.pressed:
		image = $Scratcher.get_texture().get_data()

		image.lock()
		eraseCircle(event.position.x, event.position.y)
		image.unlock()

		imageTexture.create_from_image(image)
		$Scratcher.set_texture(imageTexture)

func eraseCircle(x, y):
	var i = 0
	var angle
	var xOutline
	var yOutline

	# erase outline
	while i < 2*PI:
		angle = i
		xOutline = radius * cos(angle)
		yOutline = radius * sin(angle)

		if (x + xOutline < 0) or (x + xOutline >= image.get_width()):
			i += PI/360
			continue
		if (y+yOutline < 0) or (y+yOutline >= image.get_height()):
			i += PI/360
			continue
		image.set_pixel(x + xOutline, y+yOutline, erase)

		i += PI/360
I’ve mostly taken this code from this tutorial.
Breaking down the not-erasing part of the code a bit more, what we’re doing is fetching the image from the TextureRect using TextureRect.get_texture() and Texture.get_data() which returns the image of the texture. Don’t forget to initialize the ImageTexture to an instance at some point (I did it in the _ready method).
Also notice that we have to lock and unlock the Image object. This is because the get_pixel() and set_pixel() functions require the image to be locked.
If you run the code at this point, you’ll correctly see a circle being erased where you click with your mouse pointer.

Next up, we need to fill in the circle inside the outline with the same “erase” color.
func eraseCircle(x, y):
	var i = 0
	var angle
	var xOutline
	var yOutline

	var j
	var xFill
	var yFill

	# erase outline
	while i < 2*PI:
		angle = i
		xOutline = radius * cos(angle)
		yOutline = radius * sin(angle)

		# erase fill
		j = 0
		while j < radius:
			xFill = j * cos(angle)
			yFill = j * sin(angle)
			if (x + xFill < 0) or (x + xFill >= image.get_width()):
				j+=1
				continue
			if (y+yFill < 0) or (y+yFill >= image.get_height()):
				j+=1
				continue
			image.set_pixel(x + xFill, y+yFill, erase)
			j+=1

		if (x + xOutline < 0) or (x + xOutline >= image.get_width()):
			i += PI/360
			continue
		if (y+yOutline < 0) or (y+yOutline >= image.get_height()):
			i += PI/360
			continue
		image.set_pixel(x + xOutline, y+yOutline, erase)

		i += PI/360
We’re basically just setting the pixels from the center of the circle to the radius along the angle each time we are drawing one piece of the circle’s outline.

Now that we have the circle functioning correctly, we can switch to the drag event, which will basically be erasing circles along the path from the origin point to the destination point.
func _input(event):
	if event is InputEventScreenTouch and event.pressed:
		image = $Scratcher.get_texture().get_data()

		image.lock()
		eraseCircle(event.position.x, event.position.y)
		image.unlock()

		imageTexture.create_from_image(image)
		$Scratcher.set_texture(imageTexture)
	if event is InputEventScreenDrag:
		var target = event.position + event.relative
		var temp = event.position
		var starting_distance = temp.distance_to(target)
		image = $Scratcher.get_texture().get_data()
		image.lock()
		while temp.distance_to(event.position) < starting_distance:
			eraseCircle(temp.x, temp.y)
			temp += (event.relative.normalized() * event.speed)
		image.unlock()
		imageTexture.create_from_image(image)
		$Scratcher.set_texture(imageTexture)
A common feature of many scratcher apps is the auto-finishing of the scratcher after the user has scratched “enough” of the scratcher for it to be considered complete.
There are two ways to accomplish this. The first is to scan through the Scratcher texture’s image to see how many pixels are transparent, but this is extremely costly to do unless you only check every several tens or hundreds of frames. The simpler, less taxing way to do it is to just keep a counter of how many pixels we’ve modified.
extends Node2D

var imageTexture : ImageTexture
var image : Image
var radius = 50.0
var erase = Color(0.0, 0.0, 0.0, 0.0)
var complete_percentage = 0.5
var scratched_amount = 0.0
var num_pixels

func _ready():
	imageTexture = ImageTexture.new()
	image = $Scratcher.get_texture().get_data()
	num_pixels = image.get_height() * image.get_width()

func _process(delta):
	if scratched_amount / num_pixels > complete_percentage:
		$Scratcher.set_texture(null)

func _input(event):
	if $Scratcher.get_texture() == null: return
	if event is InputEventScreenTouch and event.pressed:
		image = $Scratcher.get_texture().get_data()

		image.lock()
		eraseCircle(event.position.x, event.position.y)
		image.unlock()

		imageTexture.create_from_image(image)
		$Scratcher.set_texture(imageTexture)
	if event is InputEventScreenDrag:
		var target = event.position + event.relative
		var temp = event.position
		var starting_distance = temp.distance_to(target)
		image = $Scratcher.get_texture().get_data()
		image.lock()
		while temp.distance_to(event.position) < starting_distance:
			eraseCircle(temp.x, temp.y)
			temp += (event.relative.normalized() * event.speed)
		image.unlock()
		imageTexture.create_from_image(image)
		$Scratcher.set_texture(imageTexture)

func eraseCircle(x, y):
	var i = 0
	var angle
	var xOutline
	var yOutline

	var j
	var xFill
	var yFill

	# erase outline
	while i < 2*PI:
		angle = i
		xOutline = radius * cos(angle)
		yOutline = radius * sin(angle)

		# erase fill
		j = 0
		while j < radius:
			xFill = j * cos(angle)
			yFill = j * sin(angle)
			if (x + xFill < 0) or (x + xFill >= image.get_width()):
				j+=1
				continue
			if (y+yFill < 0) or (y+yFill >= image.get_height()):
				j+=1
				continue
			var prev_color = image.get_pixel(x + xFill, y+yFill)
			if prev_color.a > 0:
				scratched_amount+=1
			image.set_pixel(x + xFill, y+yFill, erase)
			j+=1

		if (x + xOutline < 0) or (x + xOutline >= image.get_width()):
			i += PI/360
			continue
		if (y+yOutline < 0) or (y+yOutline >= image.get_height()):
			i += PI/360
			continue
		var prev_color = image.get_pixel(x + xOutline, y+yOutline)
		if prev_color.a > 0:
			scratched_amount+=1
		image.set_pixel(x + xOutline, y+yOutline, erase)

		i += PI/360
Our scratcher demo is basically done at this point, however, if you try to run it, you’ll notice the behavior is quite sluggish.
Optimization
What’s happening right now is that despite how small our image is, when we draw a circle, we’re drawing a whole bunch of times, but we don’t need to be doing that when our image is so small and our radius is also really small. So instead, we’re going to use some variables to control how fine/thorough we draw our circles.
extends Node2D

var imageTexture : ImageTexture
var image : Image
var radius = 50.0
var erase = Color(0.0, 0.0, 0.0, 0.0)
var complete_percentage = 0.5
var scratched_amount = 0.0
var num_pixels
const fillIntensity = 50
const circleIntensity = 360

func _ready():
	imageTexture = ImageTexture.new()
	image = $Scratcher.get_texture().get_data()
	num_pixels = image.get_height() * image.get_width()

func _process(delta):
	if scratched_amount / num_pixels > complete_percentage:
		$Scratcher.set_texture(null)

func _input(event):
	if $Scratcher.get_texture() == null: return
	if event is InputEventScreenTouch and event.pressed:
		image = $Scratcher.get_texture().get_data()

		image.lock()
		eraseCircle(event.position.x, event.position.y)
		image.unlock()

		imageTexture.create_from_image(image)
		$Scratcher.set_texture(imageTexture)
	if event is InputEventScreenDrag:
		var target = event.position + event.relative
		var temp = event.position
		var starting_distance = temp.distance_to(target)
		image = $Scratcher.get_texture().get_data()
		image.lock()
		while temp.distance_to(event.position) < starting_distance:
			eraseCircle(temp.x, temp.y)
			temp += (event.relative.normalized() * event.speed)
		image.unlock()
		imageTexture.create_from_image(image)
		$Scratcher.set_texture(imageTexture)

func eraseCircle(x, y):
	var i = 0
	var angle
	var xOutline
	var yOutline

	var j
	var xFill
	var yFill

	# erase outline
	while i < 2*PI:
		angle = i
		xOutline = radius * cos(angle)
		yOutline = radius * sin(angle)

		# erase fill
		j = 0
		while j < radius:
			xFill = j * cos(angle)
			yFill = j * sin(angle)
			if (x + xFill < 0) or (x + xFill >= image.get_width()):
				j+=radius/fillIntensity
				continue
			if (y+yFill < 0) or (y+yFill >= image.get_height()):
				j+=radius/fillIntensity
				continue
			var prev_color = image.get_pixel(x + xFill, y+yFill)
			if prev_color.a > 0:
				scratched_amount+=1
			image.set_pixel(x + xFill, y+yFill, erase)
			j+=radius/fillIntensity

		if (x + xOutline < 0) or (x + xOutline >= image.get_width()):
			i += PI/circleIntensity
			continue
		if (y+yOutline < 0) or (y+yOutline >= image.get_height()):
			i += PI/circleIntensity
			continue
		var prev_color = image.get_pixel(x + xOutline, y+yOutline)
		if prev_color.a > 0:
			scratched_amount+=1
		image.set_pixel(x + xOutline, y+yOutline, erase)

		i += PI/circleIntensity
Another way to improve on this design is to use Image.blit_rect() to stamp the eraser onto the image. A big disadvantage of this is that we will no longer be able to keep track of exactly which pixels we’re changing so we can clear the scratcher once most of it is complete. Instead, we’re going to need to loop through the image every so often in _process to see how many pixels are visible.
extends Node2D

var imageTexture : ImageTexture
var image : Image
var radius = 50.0
var erase = Color(0.0, 0.0, 0.0, 0.0)
var complete_percentage = 0.5
var scratched_amount = 0.0
var num_pixels
const fillIntensity = 48
const circleIntensity = 120

var eraser : Image
var eraserMask : Image
var eraserSize = 0
var alphaOne = Color(0.0, 0.0, 0.0, 1.0)
var intDelta = 0.0

func _init():
	initEraser()

func initEraser():
	eraser = Image.new()
	eraserMask = Image.new()
	eraser.create(radius*2, radius*2,false,Image.FORMAT_RGBA8)
	eraserMask.create(radius*2, radius*2,false,Image.FORMAT_RGBA8)
	var x = radius
	var y = radius
	var i = 0
	var angle
	var x1
	var y1

	var j
	var x2
	var y2

	eraser.fill(Color(1.0,0.0,0.0,1.0))
	eraser.lock()
	eraserMask.lock()
	# erase outline
	while i < 2*PI:
		angle = i
		x1 = radius * cos(angle)
		y1 = radius * sin(angle)

		# erase fill
		j = 0
		while j < radius:
			x2 = j * cos(angle)
			y2 = j * sin(angle)
			if (x + x2 < 0) or (x + x2 >= eraser.get_width()):
				j+=radius/fillIntensity
				continue
			if (y+y2 < 0) or (y+y2 >= eraser.get_height()):
				j+=radius/fillIntensity
				continue
			var prev_color = eraser.get_pixel(x + x2, y+y2)
			if prev_color.a > 0:
				eraserSize+=1
			eraser.set_pixel(x + x2, y+y2, erase)
			eraserMask.set_pixel(x + x2, y+y2, alphaOne)
			j+=radius/fillIntensity
		if (x + x1 < 0) or (x + x1 >= eraser.get_width()):
			i += PI/circleIntensity
			continue
		if (y+y1 < 0) or (y+y1 >= eraser.get_height()):
			i += PI/circleIntensity
			continue
		var prev_color = eraser.get_pixel(x + x1, y+y1)
		if prev_color.a > 0:
			eraserSize+=1
		eraser.set_pixel(x + x1, y+y1, erase)
		eraserMask.set_pixel(x + x2, y+y2, alphaOne)
		i += PI/circleIntensity
	eraser.unlock()
	eraserMask.unlock()

func _ready():
	imageTexture = ImageTexture.new()
	image = $Scratcher.get_texture().get_data()
	num_pixels = image.get_height() * image.get_width()

func _process(delta):
	var x = 0
	var y = 0
	var pixel : Color
	var erase_count = 0.0
	var times = 0

	intDelta += delta
	if intDelta > 0.15:
		intDelta = 0.0
	else:
		return
	if $Scratcher.get_texture() == null: return
	image = $Scratcher.get_texture().get_data()

	image.lock()
	for x in range(0, image.get_width()):
		for y in range(0, image.get_height()):
			pixel = image.get_pixel(x,y)
			if (pixel.a < 1):
				erase_count+=1.0
			y+=1
		x+=1
	if erase_count / num_pixels > complete_percentage:
		$Scratcher.set_texture(null)
	image.unlock()
	#if scratched_amount / num_pixels > complete_percentage:
	#	$Scratcher.set_texture(null)

func _input(event):
	if $Scratcher.get_texture() == null: return
	if event is InputEventScreenTouch and event.pressed:
		image = $Scratcher.get_texture().get_data()

		#image.lock()
		#eraseCircle(event.position.x, event.position.y)
		#image.unlock()
		image.blit_rect_mask(eraser,eraserMask,eraser.get_used_rect(),Vector2(event.position.x - radius,event.position.y - radius))

		imageTexture.create_from_image(image)
		$Scratcher.set_texture(imageTexture)
	if event is InputEventScreenDrag:
		var target = event.position + event.relative
		var temp = event.position
		var starting_distance = temp.distance_to(target)
		image = $Scratcher.get_texture().get_data()
		#image.lock()
		while temp.distance_to(event.position) < starting_distance:
			#eraseCircle(temp.x, temp.y)
			image.blit_rect_mask(eraser,eraserMask,eraser.get_used_rect(),Vector2(event.position.x - radius,event.position.y - radius))
			temp += (event.relative.normalized() * event.speed)
		#image.unlock()
		imageTexture.create_from_image(image)
		$Scratcher.set_texture(imageTexture)

func eraseCircle(x, y):
	var i = 0
	var angle
	var xOutline
	var yOutline

	var j
	var xFill
	var yFill

	# erase outline
	while i < 2*PI:
		angle = i
		xOutline = radius * cos(angle)
		yOutline = radius * sin(angle)

		# erase fill
		j = 0
		while j < radius:
			xFill = j * cos(angle)
			yFill = j * sin(angle)
			if (x + xFill < 0) or (x + xFill >= image.get_width()):
				j+=radius/fillIntensity
				continue
			if (y+yFill < 0) or (y+yFill >= image.get_height()):
				j+=radius/fillIntensity
				continue
			var prev_color = image.get_pixel(x + xFill, y+yFill)
			if prev_color.a > 0:
				scratched_amount+=1
			image.set_pixel(x + xFill, y+yFill, erase)
			j+=radius/fillIntensity

		if (x + xOutline < 0) or (x + xOutline >= image.get_width()):
			i += PI/circleIntensity
			continue
		if (y+yOutline < 0) or (y+yOutline >= image.get_height()):
			i += PI/circleIntensity
			continue
		var prev_color = image.get_pixel(x + xOutline, y+yOutline)
		if prev_color.a > 0:
			scratched_amount+=1
		image.set_pixel(x + xOutline, y+yOutline, erase)

		i += PI/circleIntensity
I don’t like this as much because it doesn’t feel as reactive. Maybe if you decide upon this approach, you can play around with ways to make it more responsive.
Next Time
Next time, I’m going to post a tutorial on how to randomize the result behind the scratcher.

Thanks for sharing! This has been very helpful for a drawing tool I’ve been working on. Question: How exactly would you do this using a rectangle shape instead of a circle shape? So instead of outlining and filling a circle based on a radius value, you would outline and fill a rectangle based on the width and height. I’ve been trying to figure this out for hours now but can’t come up with a good implementation using your code’s logic but I’m sure there is a solution to it.
LikeLike
That’s actually much easier to do than a circle. You would just need a fillRect() function where you loop from x-(width/2) to x+(width/2) and an inner loop of y-(height/2) to y+(height/2) calling image.set_pixel at each point. Let me know if you’d like me to write up a tutorial on it. 🙂
LikeLike